Saturday, July 20, 2013

Window love

Our builder installed a lot of crown molding and column trim, and they put in pretty door casings, but they only put sills and aprons on the windows.

I have been dying to try to install trim, but it seemed pretty tricky.  And then all of a sudden, there were two posts I found that explained how to do it - serendipity!  This is great because I am convinced that I won't like any window treatments on the five windows around my kitchen table unless they are trimmed out. 

The first post is by a Ronda from Batchelors Way when she guest posted on Sandra's great blog Sawdust Girl which you can see  here - did you follow that?  Also, Family Handyman had a great method for measuring here.

I decided to try it on a big empty box looking window that is an eyesore in our foyer. It isn't even close to square and is wavy on the left hand side.


Not a great picture, but I think you get the idea.  I measured and bought just enough pre-primed molding to do the window with a little bit left over.  Big. Mistake.  Here are some pictures of the window progress and why not buying extra was not the best idea.


Then I used the marking method for measuring all the way around.  If you really squint (or click on the picture), you can see the pencil mark on the wall and on the trim.


I got all the way around and realized that I had made a bigggggg mistake! I had forgotten on my first cut that I couldn't just extend the pencil mark in a straight line from the skinny trim side to the top and cut it there because the trim is cut at an angle.  Does that make sense?  The pencil mark was the innermost corner, so I should have extended the mark at a 45 degree angle out.  This left me with a gap.  A big gap.  A non try to fake it with caulk gap.


This shows what I did wrong:


The right thing to do would be to go buy more and install it correctly, but it was raining and a tropical storm was on its way.  It might be 2 days before I could get to the store.  I couldn't bear the thought of this little project being put off when I have so many others I was working on, so I really broke the rules.  (Trim professionals, this would be a good time to look away.)

I cut a piece of molding and glued it into the space.  I know, I know... I couldn't help myself!


Here is the corner after caulking...  It is sooo hard to see it, and fortunately, it is in the lower bottom corner.  Whew!  I DO NOT recommend doing this.  Unless you have a tropical storm coming your way.


And here is the painted window trim...


And here is another view...


I love love love it!!  I have such a ridiculous case of window love!  Now if I can just decide whether to do a stair rail or board and batten up the steps, I can get the wall painted.  Yay!
You may be able to spot the picture of a great board and batten from Better After.  (The person who did the great b & b didn't have a blog or I would link to it.)

Thursday, June 27, 2013

Master closet part 2


So this is the layout of our master closet that I have been working on.  The first wall is finished and the details are here.  This is the view of wall 2 and 3.


And here is the plan for wall 3:
The tower on the left hand side and the corner tower on wall 1 span across wall 2.  There will be two rods here for hanging items.  Each tower will be reinforced to hang the rods so they aren't just going into drywall.  These corner tower shelves will hold off season items or items that aren't worn that often.  The hanging clothes will keep them hidden, but they will be easy to access.


Here is the almost finished piece in the closet.  If I were to do them again, I wouldn't use the wall of the tower for the side of the dresser.  I would build the drawers as a stand alone piece and then use a face frame to cover the fronts of the sides.


A finished closet picture will be coming soon!

Saturday, June 1, 2013

Master closet part 1

Our master closet really is two closets so it is a little challenging to work with.  Here is the layout:


Before when you opened the closet door, this is what you would have seen:


Wall 1


Walls 2 and 3


Up top

Clearly the white wire shelving and "drawers" weren't working.  This is also after the closet was straightened up.  It was depressing to walk in there everyday, and I want to say that my closet was better.  I won't.


So here is the plan for walls 1 and 3 in Sketchup (love this and wish they would get an app!)


I tried to maximize the use of the sheets of plywood for the towers (Purebond, of course!) so the towers are all 96 inches high. 


The two corners will have shelving that will stay mostly hidden and we'll use that for off season clothing or items that aren't used very often.  I still need to figure out the shelving, if any between the two main units on walls 1 and 3.

There will be two hanging rods at two different heights between the corner towers of walls 1 and 3.  I have added plywood strips using the kreg jig on both towers at the correct height so the rods can be screwed into those instead of drywall.  Also, since each unit is also screwed into the studs, the weight of the hanging clothes won't be a problem.


And here are some progress pictures of Wall 1:


I built the towers outside of the closet and then built the drawers to fit.


Once the two towers were in their corners, I add a brace between them to make the space square.  I then added stiles using blocks of wood as jigs to make sure the space height were the same.  I also added the drawer slides.  

This was the first time using wooden slides rather than euro slides.  There were a few reasons for this.  First, I wanted to try them out.  Second, the drawers wouldn't get heavy use so I thought they might hold up.  Third, I thought they would be easier.  Hmmmm.... Still not sure about that because drawers are drawers and they can be finicky.  I will probably use the drawer slides for the most part in the future, but these do work well.


I built the drawer boxes and fit them.


And then added the drawer fronts.


Yea!  I am thrilled!  There will be several shelves in the towers, but for some insane reason, I thought it would be easier to drill the shelf pin holes once they were installed.  HA!  None of our drills would even fit in the opening, so we bought a small profile Black and Decker that would.  On the plus side, the smaller drill is a manageable size for my 7 yr old.  Lesson learned!

I keep opening up the door just to stare and smile and not just because I can say 'I built that' but because anything that even hints at organization and neatness makes me swoon a bit.

More to come!

Tuesday, May 14, 2013

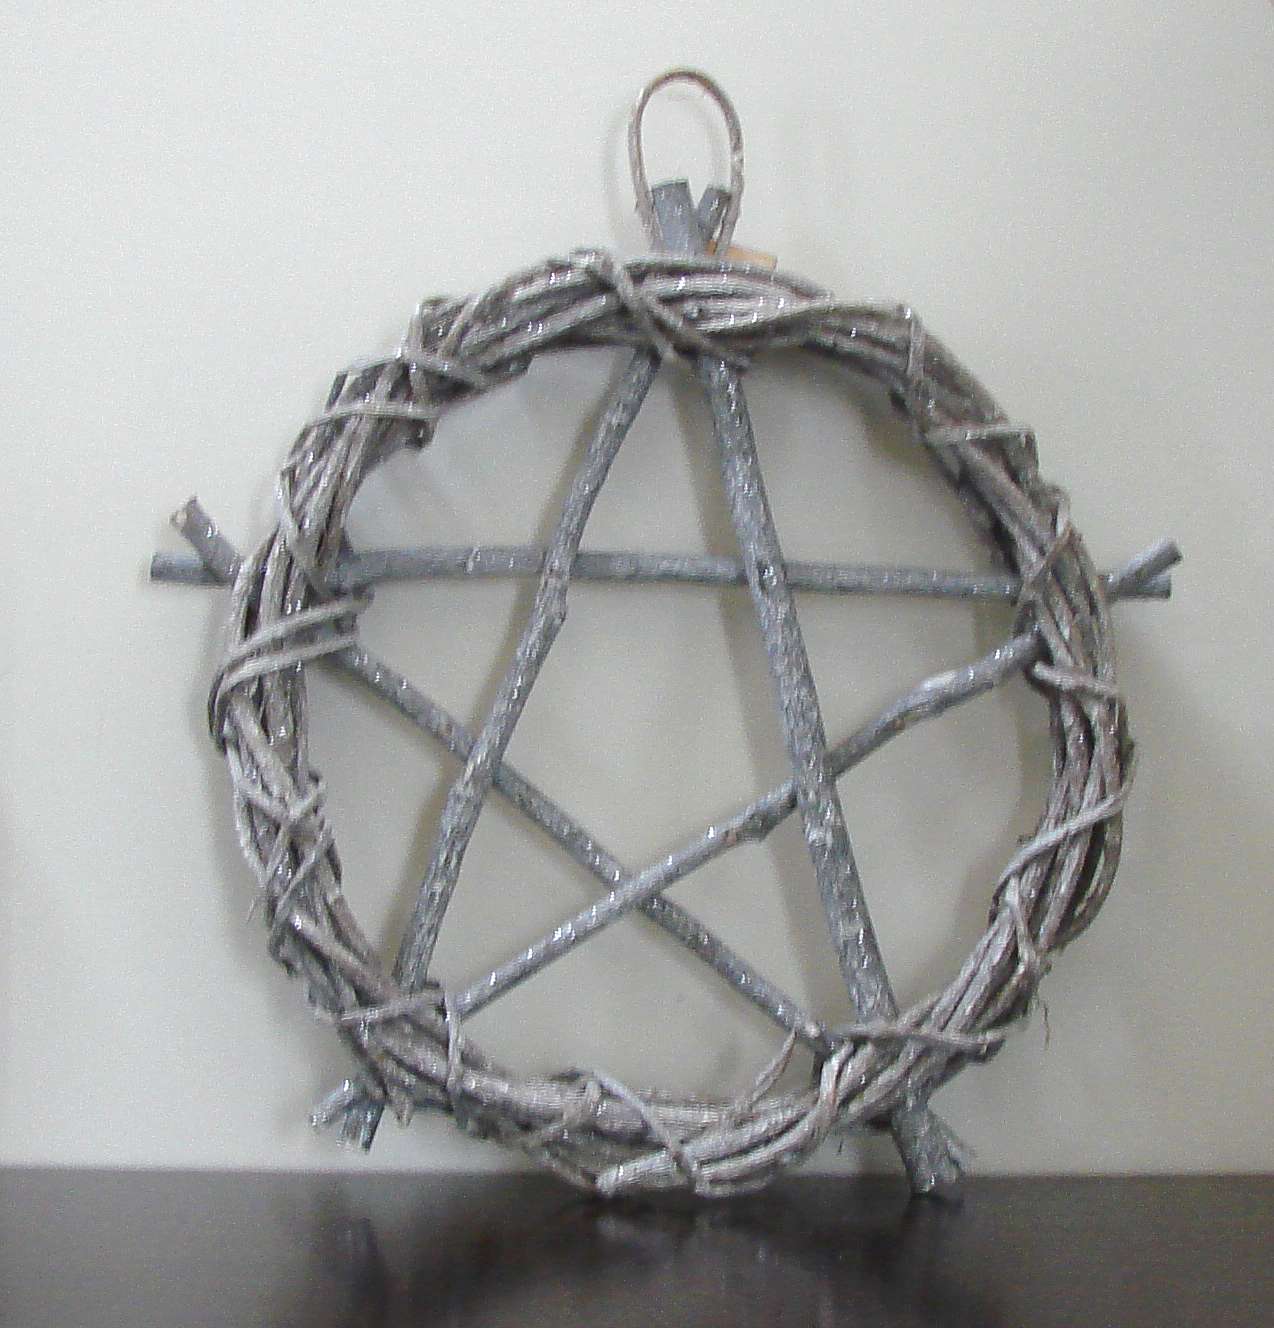
Here in Florida, my unwanted guests are usually bugs, snakes, scorpions...

I thought that the great brownish/grey color and rustic look of this piece would look great in the bedroom redo maybe leaning up against a modern mirror.  Then my husband reminded me that in Buffy the Vampire Slayer, every demon who came out of the ground came through a symbol like this.  Back it goes - stat - because I'm thinking that I really shouldn't have any "portal to hell" decor.  Sigh...


Now, I just need to make sure it doesn't fall over so it is lying flat on the ground and that no one accidentally cuts their finger on it before I can get it outta here.

 *This post was written before I changed the name of my blog.*

Thursday, February 28, 2013

New bed!

Yea! It still needs a little extra poly, but otherwise, the bed is done!!! I wanted it to look like the Pottery Barn Farmhouse bed. Big thanks to Ana White and a modification of the bed that I saw on her Brag Post page here: http://ana-white.com/2011/03/modified-farmhouse-bed-0.  I am so very happy!  It really looks beautiful with the dresser I built.


my bed
PB bed


And just as a reminder....
before

 
after

 *This post was written before I changed the name of my blog.*

Friday, February 22, 2013

I like your hat, Mrs. Nesbitt!


Usually, I pull my dust mask down to my neck when I am don't need it, but the metal nose thing was bugging me so I guess I had put it on my head.  Like a little hat.  I didn't realize until I walked into my bathroom that this is how I looked to my neighbors.

I was wearing my hat while working on the modification of Ana White's farmhouse bed.  Hopefully, it will be finished this weekend.   Yea!!

*This post was written before I changed the name of my blog.*

Thursday, February 21, 2013

Time for a new bed, bedding, window treatments...

When we first picked out our home, I had great ideas for the master bedroom.  I loved how our old one was decorated, but I wanted something a little more modern this time.  We picked out a great celery green color which the builder painted, and I found steel grey bedding and cool round stool/ottoman from my beloved TJs.    I thought the room would come together beautifully (and quickly.)  This is how Macy's envisioned the bedding - gorgeous!


 And here it is in our room...


Now, I know you're thinking, "Dang, girl!  You need to audition for Design Star!"  To which I would say:  magic like this is tough to recreate.  Mainly because it is so painful to look at. 

PAINT:  As soon as the paint when up and I saw it during full sun, all I could hear in my head was, "you could even say it glowed."  Yep, I should know to never pick out a paint color without seeing it in a room at different times of the day because the light makes such a big difference.  It also made the tile in the shower look kind of pink.  (Big thanks to Annette for consoling me!)

BLINDS:  $50 blinds  shouldn't break during the first year of use, but I think it was the Design Gods stepping in to let me know that a red next to glowing green only looks good on the red-eyed tree frog I saw on Wild Kratts.

BEDDING:  What can I say.  I bought a duvet even though I know I hate how the comforter moves all around even if you try to staple the corners of the comforter to said duvet.  And bed skirts.  Bed skirts hate me.  This one is slick, so it really moves around.  In a couple of days, it had moved leaving a huge pile on the floor and no coverage on the other.  Plus, we have a really high "pillow top" mattress which is Latin for "no sheet will ever fit" so the combo of a half-naked pillow top mattress and shlumpy bed skirt is really unfortunate.

Side note:  We did have one year when our rescue dog, Xena the Warrior Princess, spent most every day hiding under a bed - the heavily fortified cotton bed skirt made her feel safe.  This bed skirt is good for only one thing - making Cleetus feel he is invisible.  There is going to be hell to pay when I get rid of it.

This will all be remedied in an upcoming post!

 *This post was written before I changed the name of my blog.*

Wednesday, February 13, 2013

Shaker Style Dresser Plans

The dresser plans are finally complete!  You can see by the picture below that these plans are a little different than the dresser that I built.

The first design difference is how I constructed the sides and legs. I made this change because it is simpler and sleeker.  I  made the top two drawers slightly shorter and each drawer width 1/4" smaller so you would only need one sheet of 3/4"plywood making it much less expensive!  The remaining design and construction methods are the same as my dresser - consider this the new and improved version!  The Purebond really made this dresser pretty!

(This is a mod of Patrick's Beach Dresser from anawhite.com - thanks!)

 Link to these plans on ana-white.com


***special note***  If you do not have a jigsaw or if you are planning to stain the dresser, there is a modification for each instance in step 4.  Each of these requires the purchase of an additional 1x2x6.

SHOPPING LIST

Wood:

4 - 1x2x8
1 - 1x2x6
2 - 1x3x6
1 - 1x5x6
3 - 1x8x8
1 sheet 3/4" birch plywood
1 sheet 1/2" birch plywood
2 sheets 1/4" birch plywood (review cut list below before purchasing)
8 pair 14"  euro drawer slides
16 knobs
2" finish nails
1 1/4" finish nails
5/8" finish nails
1 1/4" pocket hole screws
wood  glue
wood filler


TOOLS

measuring tape
square
safety glasses
hammer or nailer
hearing protection
drill
table saw
compound miter saw
kreg jig

CUT LIST - Boards

Side trim:
4 - 1x2 @14 1/4"

Legs:
4 - 2x2 @35 1/4"

Front trim:  
2 - 2x2 @ 62 1/4"

Back brace:
1 - 1x2 @ 62 1/4"

Drawer dividers:
6 - 1x2 @ 30 3/4"

Small drawer fronts:
2 - 1x5 @ 30 1/2"

Large drawer fronts:
6 - 1x8 @ 30 1/2"

Top trim:
1 - 1x2 @ 67 1/4"
2 - 1x2 @ 18 1/4"

CUT LIST - Plywood

3/4 Plywood:

Sides:
2 - 14 1/4" x 32 1/2"

Center:
1 - 17 1/4" x 31 3/4"

Top and bottom:
2 - 15 3/4" x 62 1/4"

1/2" Plywood

Large drawer front/backs:
12 - 5 3/4" x 28 3/4"

Small drawer front/backs:
4 - 3 1/2" x 28 3/4"

Large drawer sides:
12 - 5 3/4" x 14"

Small drawer sides:
4 - 3 1/2" x 14"

1/4" Plywood

Drawer bottoms:
8 - 14" x 29 3/4"

Back:
1 - 32 1/2" x 65 1/4"


Plywood diagrams
 If you are getting this cut at a store, have them make the 32 1/2 rip cut to make the sides.  Having the sides exactly the same measurement is very important to getting the dresser square.


These are the drawer sides and front/backs.  I like to lightly label each crosscut by its row number.  For example, each drawer front/back from the first rip cut would be labeled 'row a.'  This way, I know to pair two 'row a' pieces for one drawer which ensures the pieces will be exactly the same length helping to make the drawer box square.  If I matched a front/back from row a with one from row b, they might be slightly off in measurement.  Likewise, I match sides from the same rows.


 You may not need the second sheet if you have some scrap 1/4" already.


PLEASE read through the directions entirely before starting this project.  Please use eye and hearing protection as well as any recommended safety features on your equipment.


Step 1.    Predrill 4 pocket holes in the inside top of each side to use later to attach the dresser top.  Attach trim to sides with glue and either 1 1/4" finish nails or screws from the inside.  The plywood has a 'good' and a 'not so good' side, so make sure you face the good side out.


Step 2.  Attach the posts to each side with pocket holes and 1 1/4" screws keeping the tops flush.


Step 3.   Attach the dresser bottom to the sides keeping the back of the dresser bottom flush with the back legs.  There should be a 1 1/2" space at the front.  Lay the pieces on the ground like the dresser is on its back.  Making sure each corner is square, attach using pocket holes and 1 1/4" screws from underneath.


Step 4:  Using a jigsaw, cut inserts in center section as shown below.  In addition to drawing the lines, you may want to use a straight edge to keep these corners square.


***no jigsaw*** 

If you don't have a jigsaw, make the center dimenstions as shown below and attach 1x2s as shown.  The extra 1x2 cut will be 1@ 29 1/2" and 1 @ 31".  Use pocket hole screws to screw from the center section into the 1x2s.  Try to place these where the center of the drawers will be to avoid interfering with the drawer divider or drawer slide placement.

 ***staining the dresser***

If you want to stain the dresser, this option will let you avoid sanding the plywood edge to accommodate edge banding and will also keep all the front trim the same type of wood taking the stain more evenly.  The extra 1x2 cut will be 1@ 29 1/2".  Use pocket hole screws to screw from the center section into the 1x2.  Try to place these where the center of the drawers will be to avoid interfering with the drawer divider or drawer slide placement.


 Step 5:  With the dresser still on its back, attach the center section using plenty of glue and screw from underneath.  Use 5 1 1/4" screws.


Step 6.  Attach front trim pieces (2x2s)  using the cutouts as guides.  For the bottom trim, glue and use 2" finish nails or pocket holes from underneath.  Screw directly from underneath into the cutout using 2 1/4"   screws.  

For the top trim, attach with 2 pocket holes on each side underneath and screw directly from the top into the center cutout using 2 1/4" screws.  (I also used glue on each cutout.)


Step 7.   Attach the 1x2 brace to the back with pocket holes under each side and screwing directly into the cutout using 1 1/4" screws.


Step 8:  Drill 2 pocket holes into each end of the drawer dividers.  With the holes facing downward, attach to the center and sides.  Cut a piece of wood 7 1/2" and one 4 3/4" to use as a guide/jig for each opening.  It is very important that each opening is square.


Step 9:  Build drawer boxes as shown.  There should be 6 larger and 2 smaller.  Check for square.  Put your pocket holes in the front and the very back.  The drawer fronts will cover the front pocket holes, and you won't ever see the back holes.


Step 10:  Add drawer bottoms using glue and 5/8" finish nails.


Step 11:  Install drawer glides according to package directions allowing for a 3/4" inset to accommodate the drawer front.  Working one drawer at a time, put the drawer box in the dresser.  Using 1/8" craft wood strips as spacers on all four sides, position drawer front and clamp.  Attach using a few 1 1/4" nails.  Don't put nails where your knobs will be be.  I like to write in pencil where the drawer was originally fit (e.g. L4 for left side, 4th drawer down.)  I found that the 1x8s I used varied slightly in width.  (It's probably overkill, but I wanted to be extra cautious!)


Step 12:  Attach trim to top using glue and pocket holes from underneath or 2" finish nails.  (If you don't want to miter the corners, cut the 2 side pieces to 15 3/4" and do a butt joint with the unmitered 67 1/4" front trim piece.
Step 13.  Place dresser top upside down on the ground.  Remove drawers, and place dress upside down so that the backs of the dresser and dresser top are flush and there is a 1" overhang on the front and sides.   Attach using the pocket holes and 1 1/4" screws.  Also, screw through the brace into the top using 1 1/4" screws.


Step 14.  Using glue and 5/8" finish nails, attach back to dresser.


*This post was written before I changed the name of my blog.*