Thursday, June 27, 2013
Master closet part 2
So this is the layout of our master closet that I have been working on. The first wall is finished and the details are here. This is the view of wall 2 and 3.
And here is the plan for wall 3:
The tower on the left hand side and the corner tower on wall 1 span across wall 2. There will be two rods here for hanging items. Each tower will be reinforced to hang the rods so they aren't just going into drywall. These corner tower shelves will hold off season items or items that aren't worn that often. The hanging clothes will keep them hidden, but they will be easy to access.
Here is the almost finished piece in the closet. If I were to do them again, I wouldn't use the wall of the tower for the side of the dresser. I would build the drawers as a stand alone piece and then use a face frame to cover the fronts of the sides.
A finished closet picture will be coming soon!
Saturday, June 1, 2013
Master closet part 1
Our master closet really is two closets so it is a little challenging to work with. Here is the layout:
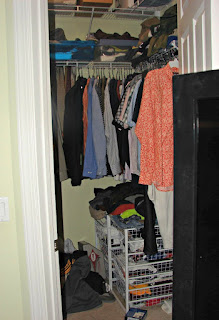
Before when you opened the closet door, this is what you would have seen:
Clearly the white wire shelving and "drawers" weren't working. This is also after the closet was straightened up. It was depressing to walk in there everyday, and I want to say that my closet was better. I won't.
So here is the plan for walls 1 and 3 in Sketchup (love this and wish they would get an app!)
I tried to maximize the use of the sheets of plywood for the towers (Purebond, of course!) so the towers are all 96 inches high.
The two corners will have shelving that will stay mostly hidden and we'll use that for off season clothing or items that aren't used very often. I still need to figure out the shelving, if any between the two main units on walls 1 and 3.
There will be two hanging rods at two different heights between the corner towers of walls 1 and 3. I have added plywood strips using the kreg jig on both towers at the correct height so the rods can be screwed into those instead of drywall. Also, since each unit is also screwed into the studs, the weight of the hanging clothes won't be a problem.
And here are some progress pictures of Wall 1:
I built the towers outside of the closet and then built the drawers to fit.
Before when you opened the closet door, this is what you would have seen:
Wall 1
Walls 2 and 3
Up top
Clearly the white wire shelving and "drawers" weren't working. This is also after the closet was straightened up. It was depressing to walk in there everyday, and I want to say that my closet was better. I won't.
So here is the plan for walls 1 and 3 in Sketchup (love this and wish they would get an app!)
I tried to maximize the use of the sheets of plywood for the towers (Purebond, of course!) so the towers are all 96 inches high.
The two corners will have shelving that will stay mostly hidden and we'll use that for off season clothing or items that aren't used very often. I still need to figure out the shelving, if any between the two main units on walls 1 and 3.
There will be two hanging rods at two different heights between the corner towers of walls 1 and 3. I have added plywood strips using the kreg jig on both towers at the correct height so the rods can be screwed into those instead of drywall. Also, since each unit is also screwed into the studs, the weight of the hanging clothes won't be a problem.
And here are some progress pictures of Wall 1:
I built the towers outside of the closet and then built the drawers to fit.
Once the two towers were in their corners, I add a brace between them to make the space square. I then added stiles using blocks of wood as jigs to make sure the space height were the same. I also added the drawer slides.
This was the first time using wooden slides rather than euro slides. There were a few reasons for this. First, I wanted to try them out. Second, the drawers wouldn't get heavy use so I thought they might hold up. Third, I thought they would be easier. Hmmmm.... Still not sure about that because drawers are drawers and they can be finicky. I will probably use the drawer slides for the most part in the future, but these do work well.
I built the drawer boxes and fit them.
And then added the drawer fronts.
Yea! I am thrilled! There will be several shelves in the towers, but for some insane reason, I thought it would be easier to drill the shelf pin holes once they were installed. HA! None of our drills would even fit in the opening, so we bought a small profile Black and Decker that would. On the plus side, the smaller drill is a manageable size for my 7 yr old. Lesson learned!
I keep opening up the door just to stare and smile and not just because I can say 'I built that' but because anything that even hints at organization and neatness makes me swoon a bit.
More to come!
Subscribe to:
Posts (Atom)


